10 WordPress Tips and Tricks

Screen Options
If you are looking around a page in WordPress and wondering why a certain area is not showing, this could be because the area is not selected to show in your screen options. To check, click the “Screen Options” box in the top right of WordPress and a box will display with a list of selections. If the box is not checked for a certain area you want to show, go ahead and check it.

Search Engine Visibility
When you are first building or creating a site with WordPress, it is good practice to check the “Discourage Search Engines from indexing this site” box. This will ask Google and other search engines to not index your site. To check to see what your current WordPress setting is, go to Settings -> Reading and see if the box is checked. If you want Google or other Search Engines to index the site, make sure you uncheck the box.

Quick Edit
Often, you may just want to make a quick change (date, time, author, etc.) on a page. Instead of having to go to the actual page, you can hover over the title and click “Quick Edit” and a list of options will appear. Simply make your changes there, click apply and you are good to go.

Edit Multiple Pages at Once
There may be an instance where you need to update more than one page at a time (aka not make a “quick edit”). In this situation, using this little trick can save you a ton of time. To edit multiple pages at once, check all the pages you want to edit (if you want an easier way to select which pages or to edit all of the pages, just click the “title” box and it will select all of your pages). Then click “apply” and a box will show underneath with options to remove any pages you don’t want to edit, change the author, status of the page, etc.

Reset Permalinks
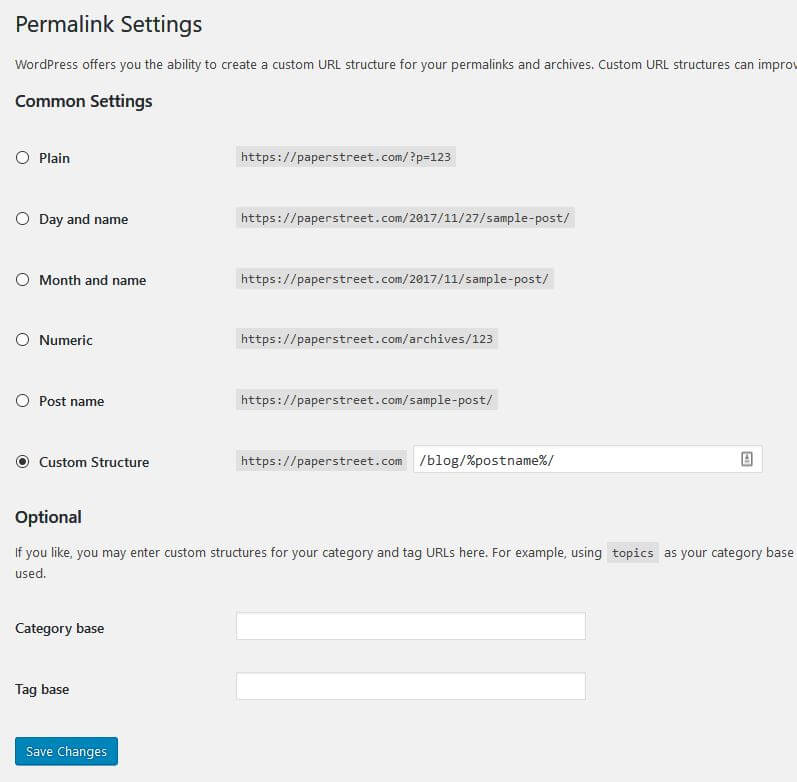
If one of your pages is broken or you changed the name of the “slug” or “link,” resetting your permalinks may solve the issue of your broken page. Pages can become broken in various ways (plugin updates, WordPress updates, etc.). To reset your permalinks, just go to Settings -> Permalinks and click “Save Changes.” There is no need to check or click anything else.

Export WordPress to Another Site
Need to import your blog on another site or updating to a newer theme? You can export your current WordPress site by heading to Tools -> Export. There you have the option to choose what you want to export. Whether it is all of your content or just your blog, you can choose what you would like to transfer here.

Clearing Your Trash
When you are adding a page with the same name as one you have used or deleted in the past, make sure you check your trash to make sure it has been permanently deleted. If you do not permanently delete, then you can end up with a “-2” at the end of your URL. To check, go to trash and make sure any page in there that you are creating again with the same name is “permanently deleted.”

Finding Your “Front Page”
If your homepage is not labeled as “Home” or “Homepage” and you are unsure what page is being used for this, navigate to Settings -> Reading. You can also easily change what page to use by selecting a new page in the dropdown.

Using Shift + Enter in the WordPress Editor
Just like in Microsoft Word, if you use Shift + Enter when in the WordPress text editor, the text will go directly below the current text, instead of adding a space (if you were to just press enter).

Share or Send an Image
If you would like to send the full-sized or original image you uploaded to your WordPress site, you can send a link that contains the image in it. To do this, go to Media -> find your image in the library -> click on the image -> select the URL.

About Us
Did you know more than 200 clients have worked with PaperStreet for more than 10 years?
Get a Free Website
Analysis and Consultation
Marketing Services


