MailChimp Troubles? Never Fear! Our Tutorial is Here (2026 Update)
If you are a PaperStreet newsletter client, you are probably familiar with the term MailChimp. For those who are not … no, unfortunately, it is not a little chimp that delivers mail. MailChimp is a third-party service we use that helps create, send, and track email newsletters.
It is a fairly easy-to-manage service that brings fun and humor to the email newsletter community. However, for someone who is not computer fluent, sending out a new campaign may feel less like a chimptastic time and more like a monkey on your back.
Not to worry, we are here to help you maneuver your way through the virtual jungle!
Step 1:
You want to go into your “Campaigns” and create a new newsletter by replicating your most recent one. Working with the copy will make the process much easier.

Step 2:
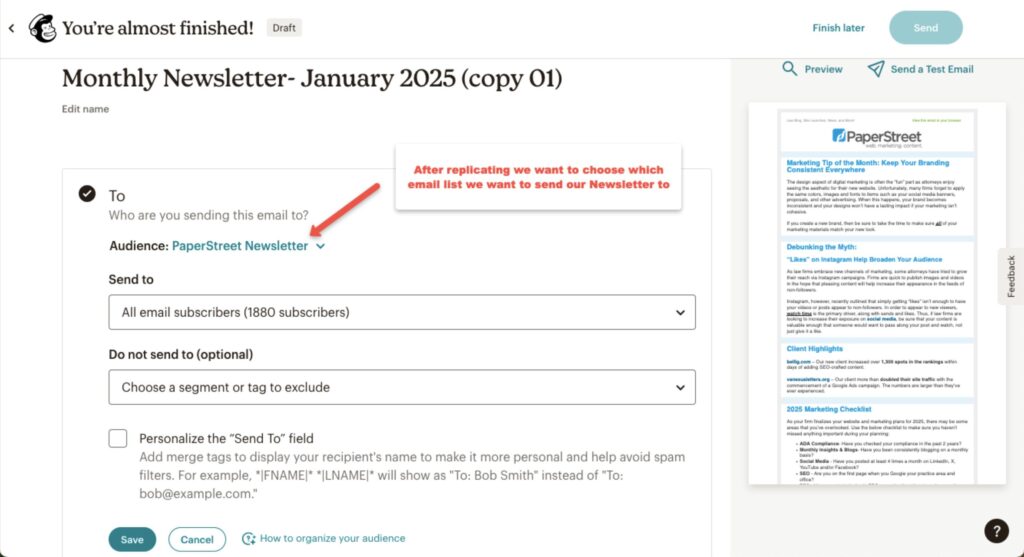
After replicating, you want to choose which email list to send your newsletter to.
Step 3:
Next, you want to name your campaign. Make sure to change the title in both the “Edit Name” and “Subject” fields.
(Quick Chimp Note: “Edit Name” will only appear to you, so it is a good way to keep organized, “Subject” will be the email subject line in the newsletter)


Don’t forget to change your email campaign link with your NEW subject line!

Step 4:
The next step is to change the content. The next few graphics will help you navigate through all the possible updates and changes you may need to make.
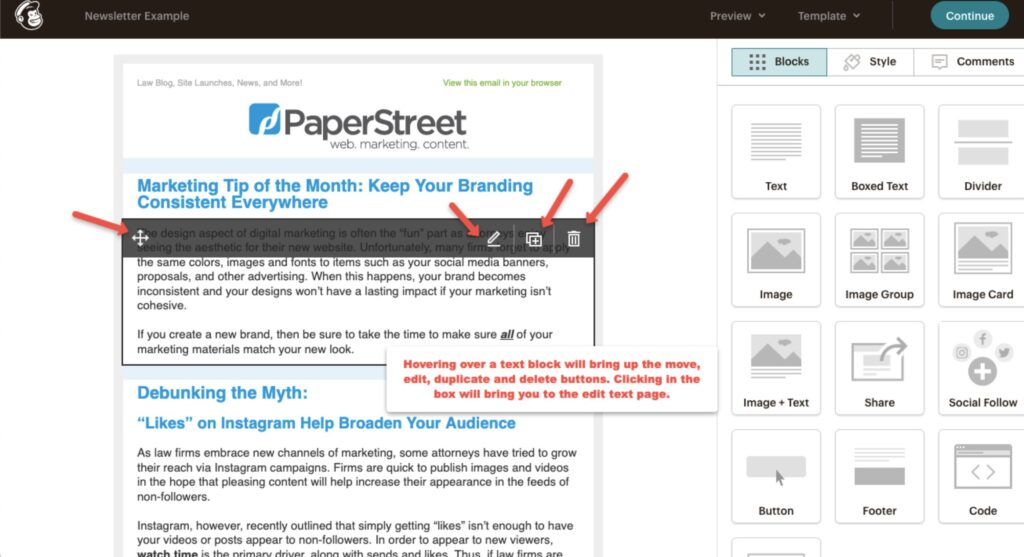
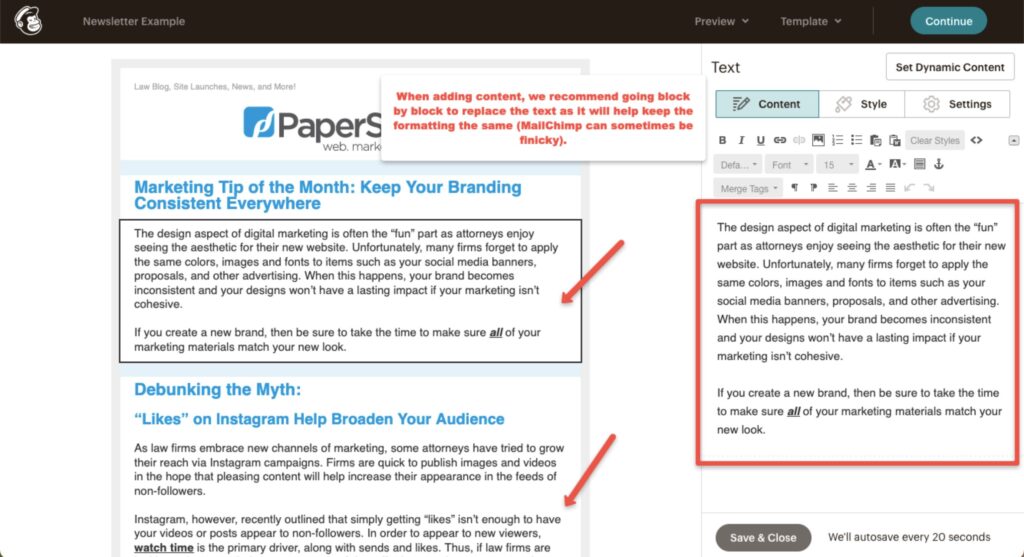
To edit the body of your text, hover over the text block you want to update. This will bring up the move, edit, duplicate, and delete buttons. Select “edit” or click in the block to open the edit text page.
The toolbar in the edit section may have a few unfamiliar icons, one of which is the “chain link.” This button is used to add links. The “picture” icon to the right of it is the file manager button, which is used to add an image.

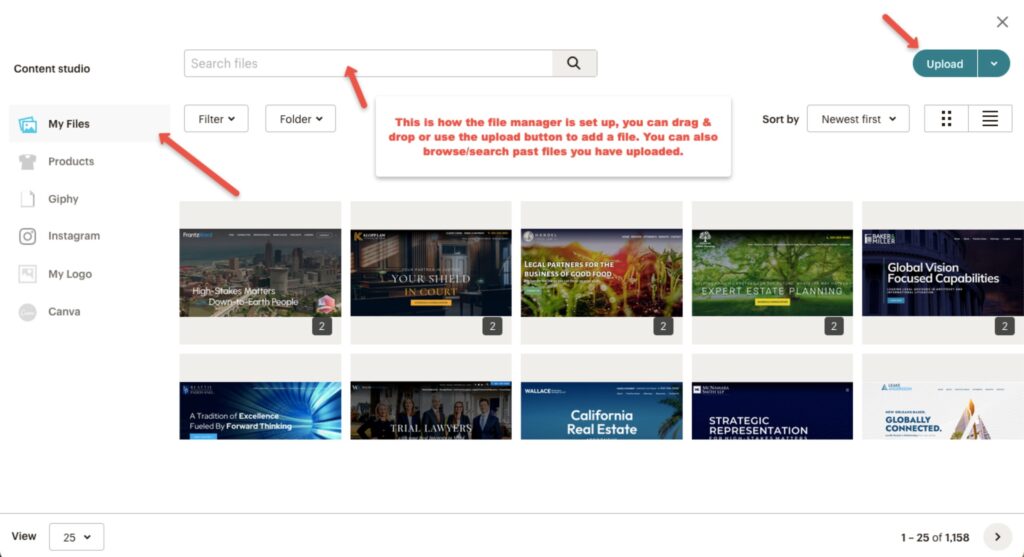
This is how the file manager looks when you open it. You can drag and drop a file, browse for it, or go to images to see past uploaded photos.
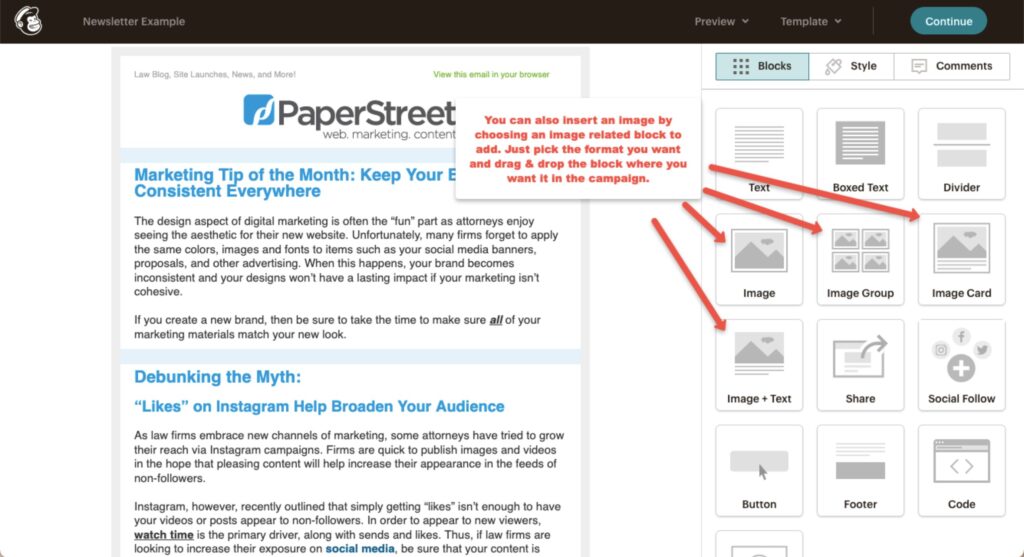
You can also insert images by choosing an image-related block to add. Just pick the format you want and then drag and drop it wherever you want it placed in the campaign. You can then drag and drop an image in, upload the file, or browse your library for past files added.

To add a link, simply highlight the text you want to be linked, click on the “chain link” button, paste the URL, and hit “insert.” You can also use this method to insert email addresses, anchor text, or files.

When adding new content, we recommend going block by block to replace the text, as it will keep the formatting the same (MailChimp can sometimes be finicky).
When you are done editing the body of your newsletter, double-check that everything makes sense and appears as you would like it. If you have information or content from your previous newsletter, be sure to change it!
Step 5:
Once you’ve completed all edits and are ready to review your final campaign, you have two options. First, you can use “Enter Preview Mode” to quickly see how it will appear. However, we strongly recommend sending a test email to yourself and others (bonus points if they use a different email platform!). This helps you catch any formatting issues and ensures your campaign looks exactly as intended in different inboxes.

Step 6:
The final step is to confirm and send. This is your last chance to review everything—ensure the correct email list is selected, the subject line is set, and the email link is updated. Once you’re confident everything looks good, you can either schedule your newsletter for a future date and time or send it immediately.

Hopefully, this tutorial has helped shake that monkey off your back! We know creating a newsletter can feel like a juggling act with all the steps involved, but don’t worry—we’ve got you covered. To make things easier, you can download a PDF of this post, complete with images and notes, so you have a trusty guide whenever you’re ready to take on your next newsletter. Happy campaigning!
What you should do next . . .

Nothing is impossible, so try, try, then try again. When the task feels impossible, come back to it with a new perspective.
Join our newsletter, where you will learn educational info on latest insights, tips and best practices.
Share:
About Us
Did you know more than 200 clients have worked with PaperStreet for more than 10 years?
Get a Free Website
Analysis and Consultation
Marketing Services