Google Calendar Guide
Many law firm websites include a Google Calendar (we embed Google Calendars within all of our client’s websites). This guide will demonstrate the process of managing the calendar yourself.
- First, you will need to access your Google account . Go to http://www.google.com and log in with your user name and password.

- Once you login you will be redirected to Google’s homepage. Once there, click on the calendar icon to access your calendar.

- You will arrive at the main landing page of the calendar. This is what it should look like on your website as well. You may also choose to view it by “Day, Week, Month, 4 Days or Agenda”.
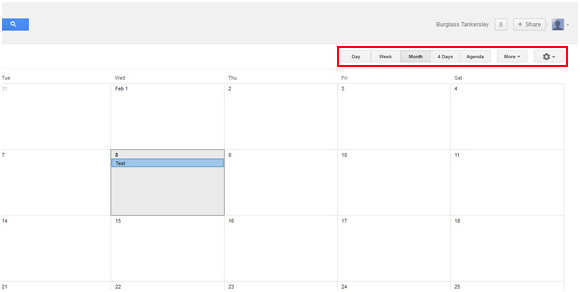
- From here you may add an event to a specific date. For my example, I will be using a test event. When you click on the date for which you would like to add an event, a small box will appear. In the lower right corner of the box, click “Edit event”.

- The page you are directed to now will allow you to add/edit your event.
- Where it says “Untitled event”, type in your event name.
- The field below it has two date boxes. You can either leave it as it is for a single day event, or you can change the second box to a later date if the event lasts multiple days. For example, if I was attending a web development conference from February 8th to February 12th, I would insert the 8th as the date in first box and the 12th as the date in the second box.
- For an event that only occurs once, leave “All day” checked. If this event occurs more than once, make sure “Repeat” is checked.
- The “Event details” tab is where you input the general information for your event. Use the “Find a time” tab to give your event a time.
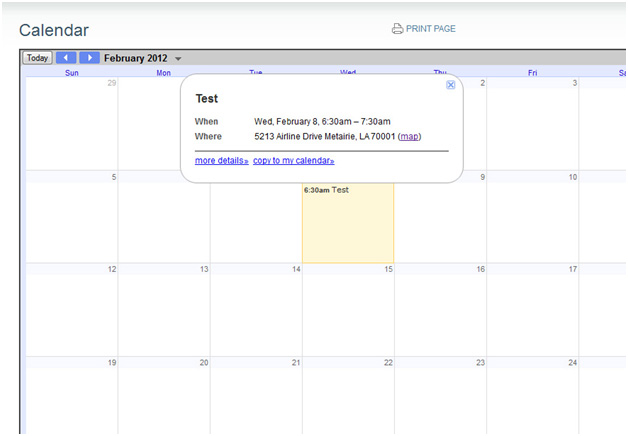
- Type the location of your event in the “Where” section. You can either type the name of the location or the address. If you list the address, the map button on the event will take you to a Google map of the location.
- Add guests’ emails to invite them to the event. This is step is optional.
- You can add a description of the event in the “Description” section.
- Set your privacy setting to “Public” so everyone who visits your website can see it.
- Click the “Save” button to save the event to your calendar.

- The event is now live on your website. You can go back and edit the event at any time on your Google calendar landing page.
What you should do next . . .
1.
For more articles like this, subscribe to our newsletter.
2.
For a deep dive on a subject, listen to our Podcasts.
3.
Schedule your FREE personalized call
with our team. One of our friendly team members will provide an audit of your website /
marketing and ideas for improvements.

About Andrew Olesko
Your website is the most important marketing tool you have for your business. Investing in quality code and marketing is the key to industry leadership.
Category
Web Design
Join our newsletter, where you will learn educational info on latest insights, tips and best practices.
Share:
About Us
Did you know more than 200 clients have worked with PaperStreet for more than 10 years?
Get a Free Website
Analysis and Consultation
Marketing Services


Articles you might like


Join the Sales and Marketing News, receive our last insights, tips and best practices.
Our 7 Guarantees
Keeping 2,000+ Clients Happy Since 2001.
1
You Will Love Your Design
We design to please you and your clients
2
Same-Day Support
24-hour turnaround edits during business hours
3
Free Education
We provide knowledge to help you expand
4
No Hidden Charges
We quote flat-rate projects
5
Own Your Site
No strings attached
6
We Create Results
SEO, PPC, content + design = clients
7
We Make Life Easier
One agency for web, branding and marketing