Enhance Your WordPress® Blog Content with Images
At PaperStreet, there are many reasons we build most of our websites in WordPress®. But if there’s one reason to rule them all, it is to enable you, the website owner, to add your own content. New posts and pages keep things fresh, making visitors (and search engines) happy. And that’s good for business.
So, as you’re adding content, how can you draw more eyes, break up text, and illustrate key points? Images.
Adding an image to a post in WordPress® involves:
- Finding, editing, and (optionally) compressing your image
- Actually adding the image to your post
Step #1: Finding, editing, and (optionally) compressing your image
Believe it or not, before you can add an image to a webpage, you need an image to add. There are many ways to acquire images, including:
- Taking your own photos
- Purchasing photos from services like iStock
Once you have an image like a JPG or PNG file, you will often want to edit its dimensions. Some photos are shaped like rectangles (e.g. 2000 x 1000 pixels) but are meant to fill a square space (e.g. 300 x 300 pixels) on the website. Using improper image proportions usually results in poor appearance of the image on the page.
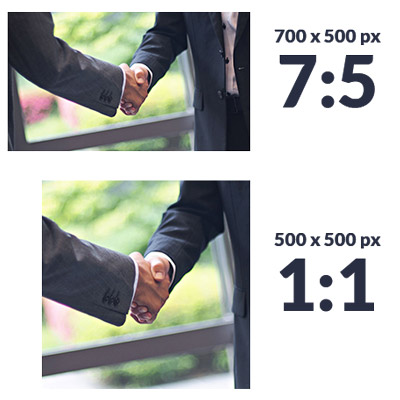
Ideally, you want an image that matches the proportions of like images. Say a new attorney joins the firm and you are adding their photo to the website. All the other attorney portraits have a 1:1, or square, image ratio sized 300 x 300 pixels. Preferably, the new attorney’s photo will be cropped to 300 x 300 pixels; but if it is not, any image size of the same 1:1 ratio will have a consistent appearance on the website.
Be mindful of file sizes. Larger images take more space on the server, and worse, take more time to deliver to visitors. Slow websites lose traffic. As a rule of thumb, small images shouldn’t take more than 50 KB of space, and even the very largest images shouldn’t take more than 500 KB.
There are two ways to reduce image file sizes; one you can do in photo editing stage, while the other requires a tool for image optimization.
- Reduce the image size. Say you are replacing a 300 x 300 image. While a 2800 x 2800 image might look acceptable on the site, it is demanding hundreds of kilobytes, if not several megabytes, of additional data on every visit to the page. Yikes! Crop the image to precisely the size it needs to be – in this example, 300 x 300 – and no more.
- Compress the image. Even if the image dimensions are a match, the image can likely be compressed, or optimized, for a smaller file size, with no perceivable difference in quality. TinyPNG is a free, easy-to-use web service that provides effective image compression. Smush is a great plugin for your WordPress® website that will automatically compress images added to your Media Library from now until the end of time.
Step #2: Actually adding the image to your post
Have your image chosen, cropped down, and ready for your website? Great! It only gets easier from here.
Here’s how to get that image onto the page:
- Log in to your WordPress® admin area if you are not already there (yourwebsite.com/wp-admin).
- Find a post to add the image to.
- (Optional) Click a line inside the content editing area to select the location where the image should be inserted.
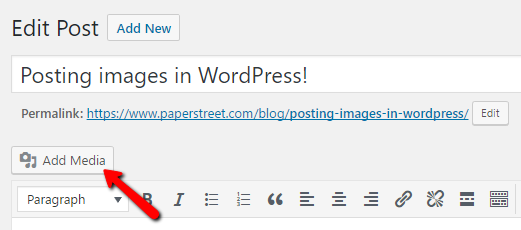
- In the top-left of the content area, click “Add Media.”
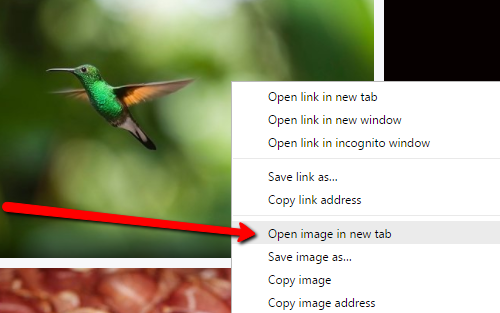
- Upload your image by dragging it into the upload space or locating it on your local hard drive.
- Once the upload completes, select the image in the Media Library, then press “Insert into post.”
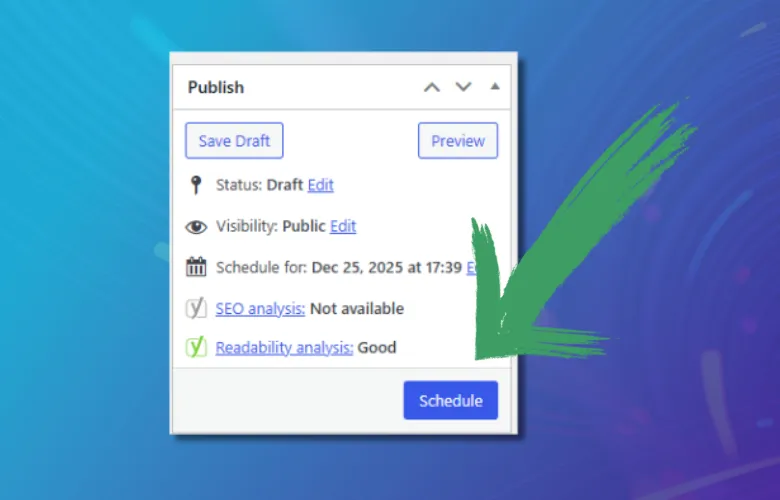
- Update (Save) or Publish the page.
This process adds the image to your website’s Media Library, a set of folders that hold uploaded images and other files. Now, if you go to a different post and press “Add Media,” you would see the image you just uploaded sitting in the Media Library. In this way, a single uploaded image can be used in multiple places.
If you ever need assistance in updating photos on your website, contact our support team at [email protected].
What you should do next . . .

Mike is a lifelong Floridian who loves all things tech and biz. He writes on the latest happenings in technology, website best practices, and accessibility.
Join our newsletter, where you will learn educational info on latest insights, tips and best practices.
Share:
About Us
Did you know more than 200 clients have worked with PaperStreet for more than 10 years?
Get a Free Website
Analysis and Consultation
Marketing Services