The Importance of Great Photography for Law Firm Websites (2026 Update)
Your Photos Matter… More Than You Think
Your website is often the first impression potential clients have of you. A well-done bio image conveys professionalism, attention to detail, and approachability. The bio page is one of the most visited pages on a law firm’s website – this was true a decade ago when we started PaperStreet and it’s true now in 2026. Clients hire attorneys for both expertise and personality—images help build trust.
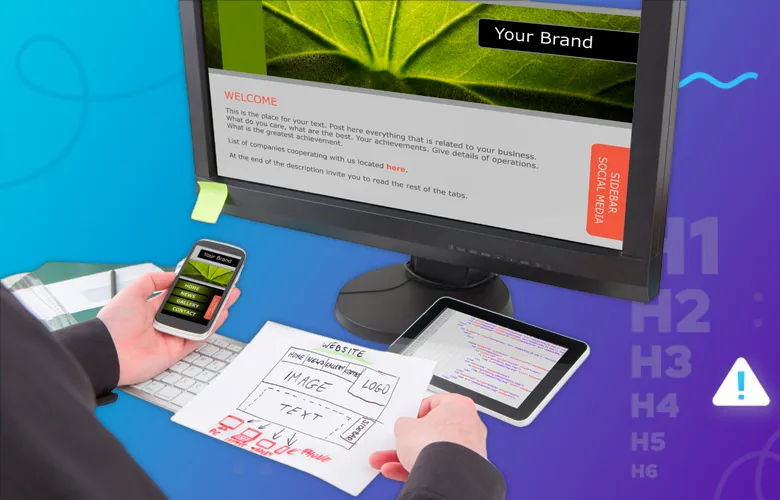
Best Practices for Professional Photography
Engaging backgrounds make a significant difference in bio images. Whenever possible, opt for real backgrounds or candid shots instead of generic backdrops for a more authentic and professional look. If you’re not sure, our designers can help you choose the best option for the overall tone and look your law firm is aiming to achieve.
When taking photos, consider the following photography tips:
- Use high-angle shots for a more flattering perspective.
- Avoid low-angle shots, as they can create unflattering shadows.
- Dress in solid colors and steer clear of distracting patterns.
- Utilize natural or ambient lighting instead of flash for a softer appearance.
- Keep the surroundings clean and uncluttered to maintain a professional look.
- Capture outdoor shots to create a natural and inviting feel.
- Take multiple shots from different angles to give designers more flexibility when selecting the best image.
Photoshop can further enhance bio images through various adjustments, such as:
- Retouching: Minor touch-ups to remove blemishes, wrinkles, or shadows.
- Background Adjustments: Extending or blurring backgrounds for a cleaner look.
- Color Correction: Adjusting saturation and tones to align with website branding.
- Object Removal: Eliminating distracting elements such as clutter or unwanted items.
- Image Collages: Combining multiple images or adding creative elements for a unique presentation.
When our law firm web designers are reviewing various bio images we assess for improvements in lighting, background choices, and post-processing techniques. One of the benefits or working with our team is getting that one on one consultation with an expert.
Webinar Translation
In the webinar we’re going to be discussing a couple of topics. So our outline for today is why is a good bio image so important for your law firm website, things you should take into account before having professional photography taken and how bio images can be enhanced in Photoshop.
Why is having a good bio image so important? Your website is often the first service you provide a potential client. It gives them a preview of your personality, your attention to detail, your ability to communicate. So it’s very important to deliver on the promises that you’re making on your website.
After the home page one of the most visited pages on your website is the bio page. Potential clients want to know a little bit about you before they contact you directly. This means that the first chance you get to make a good impression comes before you’ve even had a chance to speak or correspondence to anyone, so it’s very important to make an effort on your bio page.
Clients tend to hire an attorney for their knowledge and personality. While it’s important to expand on your real expertise and accolades, you should also spend some time thinking about your image. It pays off to have professional photography taken. It also is important to keep in mind that you should also update it every few years so your photos approximate what your current appearance is. People want to see who they might be doing business with, especially when it comes to sharing the kind of personal and sensitive information that attorneys require to provide service.
There’s no need to go to great expense, but try not to use a typical thumbnail, the typical black, green and blue backgrounds that everybody uses and in some cases they look like a poor quality scanned image. Try to avoid that. Although head shots are placed on your marketing collateral, like on your social media, email signatures, when it comes to an attorney bio page for your website, replacing it for a professional photography really pays off. You really want to think about candid photos and white background images, that really makes a difference.
Some things you should take into account before having professional photography taken. The real background images and candid photos tend to be significantly more engaging and they relate more to the user. These kinds of photographs typically portray you in a more approachable way, they tend to be more trustworthy, they also tend to look a little more reliable and they have a personal touch that most typical head shots don’t really portray.
Some useful tips when having professional photography taken for your bio image is use high angle photos. Ask whoever is taking the photograph to take a couple of shots from a higher elevation than your head. The typical image is usually eye level photos. But when you take images from a little higher elevation that provides a very different look and very custom that not everybody uses. Whatever you do, please avoid the low eye level images because this really provides for the typical double chin issues or unwanted shadows on your page, so try to avoid that.
Dress for success. Digital photography tends to make fabric patterns look a little vibrant and they tend to be a little disturbing for the eye. Try to avoid wearing any dark [inaudible 00:04:12], any small repeated shades like the typical dark shirts or things that have flower patterns or checkered patterns, because that really provides a very visual set that makes the image [inaudible 00:04:25], so that can be very disturbing for a bio image.
Again, make sure that whatever you wear is appropriate, not cropped from the shoulder or waist up, because when a designer comes in and maybe crops the image, if you’re wearing a strapless dress, it’s going to look like you’re not wearing anything if they crop you from the shoulder up, so try to avoid those kind of things. Dress for success, look professional, it’s very important.
Another thing is bring light to the photo. Let’s try to avoid using the flash and try to bring in some ambient light. It’s necessary to also bring in some lamps into your office it that’s where you’re taking the shots or try to have as much light around you as possible. Obviously, the [inaudible 00:05:15] distance so all the lamps don’t go into the photograph, but they’re actually illuminating yourself. This will make you look a lot lighter, they will bring in, eliminate any unwanted shadows, again.
Try to keep it clean and simple. Try to avoid cluttered surroundings, so if you’re taking yourself and maybe your desk or in an office shot, try to clean up a little bit before you take the actual shot. So if you have a lot of pens and maybe paperwork around your desk, let’s try to clean it up and keep it very clean, very simple and keep the bio image more about you and not have as many distracting elements.
Outdoor backgrounds. Try to get in a couple of shots also outside in nature. They tend to be a little more engaging. The natural light is also very favorable for a photographer’s eye. You can also think of taking some shots outside your office building, or any nature background really looks nice.
And as a final tip, make sure to take multiple shots. Ask whoever is taking the photographs to take photographs from different angles in the same pose and also ask the photographer to keep the background very wide. So when it comes to a designer, the designer has space to crop, if needed, depending on the design you’re choosing this bio photo in, you might need crop it a certain way. So it’s better to have more space than to have to reconstruct background. The thing goes for multiple shots, it’s always best to have a variety to choose from than to end up thinking that you should have taken a couple more shots.
How bio images can be enhanced in Photoshop. Of course, after you’ve taken wonderful bio images, you can always use some enhancements and finishing touches in Photoshop. The things we could do, we could have some face and body retouches. The typical minor retouches, we all have our little blemishes, maybe some undesired bags under our eyes, wrinkles or maybe our pants don’t look like they were really ironed and they look a little wrinkly. All these minor retouches we can take of in Photoshop and make them look real nice.
Extend backgrounds. Of course, there comes a time when we obviously do need a little more background to work with and if this is the case where the image was taken a little too cropped in and they don’t take enough space for background, we could also extend the background to look better. Although this is something we recommend, obviously we prefer that the photographer to leave some extra room in the background, if it does come to it, we could always extend the background.
Image coloring. Depending on the design of your website we can always tweak the colors a little better to make them match whatever colors are being used on your website. So we can always tweak colors in Photoshop.
We could also enhance the saturation or in some cases if it’s too saturated, we need to lower it a little bit. These are all finishing touches that we could tweak in Photoshop.
We could also erase elements. Maybe there was a flower plant or something that we thought that looked nice but maybe when it came to it in the actual design, we want it eliminated or maybe there’s a book or a pen or something that we want to get rid of in the image, we could easily Photoshop that out.
Another thing we could do is we also can create some nice image collages. So maybe we want to merge two attorney images together, or maybe some nice backgrounds. We could also create in some very nice image collages in Photoshop.
I’m going to show you a couple of examples of some nice bio images, and then we’ll discuss what could have been better or worse in each image.
Here’s a nice candid photo. Obviously, this is in his desk, in his office area, you see all the windows were open. We have very nice lighting from all around his body so that there’s not really any unwanted shadows in his face. I personally feel that the desk could have been a little cleaned up, maybe less paper work. But this is a really nice example of lighting. The lighting in this image is real, real nice. It’s a really nice bio image.
The next slide we have a couple of shots where we kept the background very clean and very neutral. So this could also be a very nice approach, where you really focusing on the person and keeping the background very light. As you see, these images were taken outdoor, so again, this is a very nice example where there are no unwanted shadows anywhere on the people’s faces, the lighting looks real nice. In some cases, the photographer can blur out any background and make you the focal point. This is also a very nice example.
The next image we have here, I’ve taken it and put in the before and after. This is a very nice photograph as well. There’s very nice lighting. But as you could see, the light was coming in from the left side of the blonde woman’s face. So it created a little bit of unwanted shadowing on one of the cheeks. So if you could see on the right side in Photoshop, this is a good example of where we can enhance those little fine touches and maybe unwanted patterns that were created on her cheek. So this is where we smooth it out a little bit on her face. Although this is a very nice shot and has really nice lighting, that’s where we can bring in the final touches in our design program.
This is a very nice example, as well, where you see they turned on some lights and brung in some lamps so that the illumination on her body’s really nice. There’s no unwanted shadows anywhere. This is a very good example of where they captured the background very nice and wide, so in the case if the designer wants to crop it there’s space to work with.
Maybe a tip for this image is also, they could have cleaned up a little bit more of the desk. Maybe have fewer items and fewer items in the background to keep it nicer. But again, this is one of those things that we could tweak in Photoshop. We can erase elements or maybe blur out certain elements and make her the focal point. So these are all things to think about when it comes to the designer, that we think we could tweak and even take it to that next level, or to actually just make it work with the design that you’ve prepared.
This example is actually an example of where we need a little more extra background for the width of the website. So here you see how we’ve taken the wooden drawers and actually expanded them and they look very, very seamless. I’m sure if I hadn’t shown you that top photo you wouldn’t really tell that wasn’t really in the original. So if could see, we’ve expanded the plant and the wooden drawers and everything and made the background wider so it fits the layout that we had designed. So again, this is a nice shot. It has nice illumination and you could see that any nature element in green looks very, very nice on the bio image.
Thank you for attending this webinar. I’m just going to open it up for questions. I will be happy to answer any of your questions.
What you should do next . . .
We create law firm website designs. Well . . . actually we create stunning, professional websites that get results for our clients. Since 2001, PaperStreet has been helping law firms grow their legal practices.
Join our newsletter, where you will learn educational info on latest insights, tips and best practices.
Share:
About Us
Did you know more than 200 clients have worked with PaperStreet for more than 10 years?
Get a Free Website
Analysis and Consultation
Marketing Services